Introduction
Data acquisition is done using the JRI BlueTooth thermometers. Pairing and adjusting a BlueTooth thermometer The synchronization of information between the MyFoodCheck app and MySirius (Cloud JRI) is made via an internet connection. If MySirius is set up on a client’s server, the synchronization will be done over the client’s network.

Prerequisites
- Apple or Android device to set up the MyFoodCheck application.
- Internet connection for the data synchronization with MySirius.
- JRI Bluetooth thermometer : BlueTherm One / TempTest Blue or RayTemp Blue
- MySirius subscription and account with activation of the FoodCheck module.
- Configuration of the FoodCheck module in MySirius
Setting up the Food Check module in MySirius
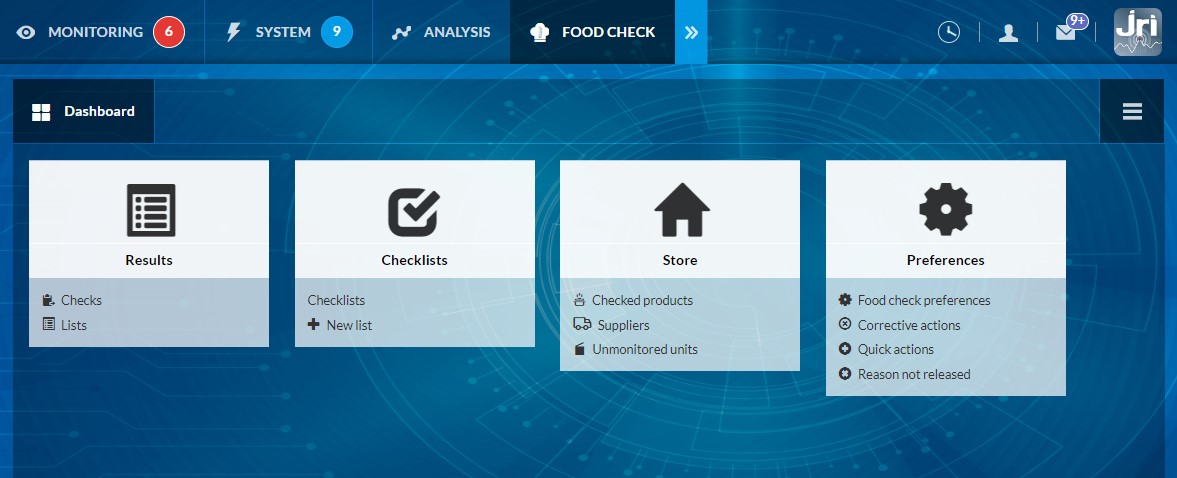
The settings are done through the FOOD CHECK tab. 4 main sections are displayed on the dashboard:
- Results
- Checklists
- Store
- Preferences
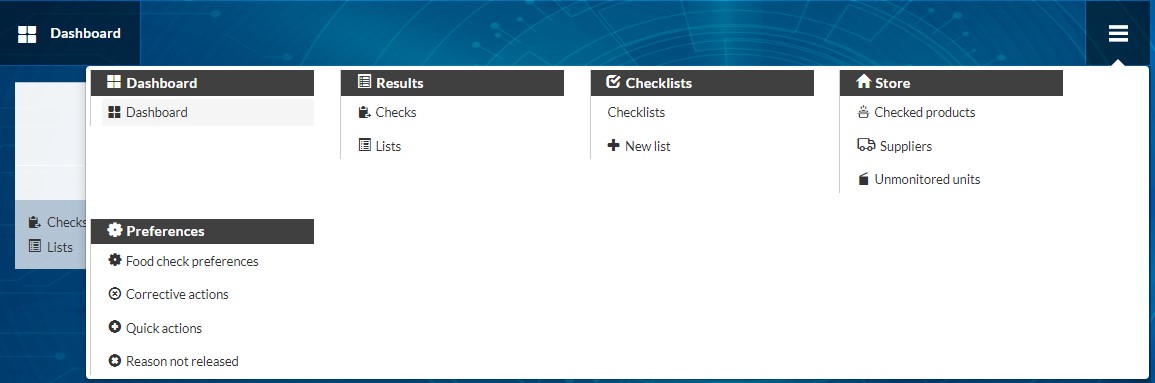
A menu allows the display of all the functionalities.
Preferences
FoodCheck Preferences
General preferences
Preferences applied to all users of the site’s MyFoodCheck application. You can customize :
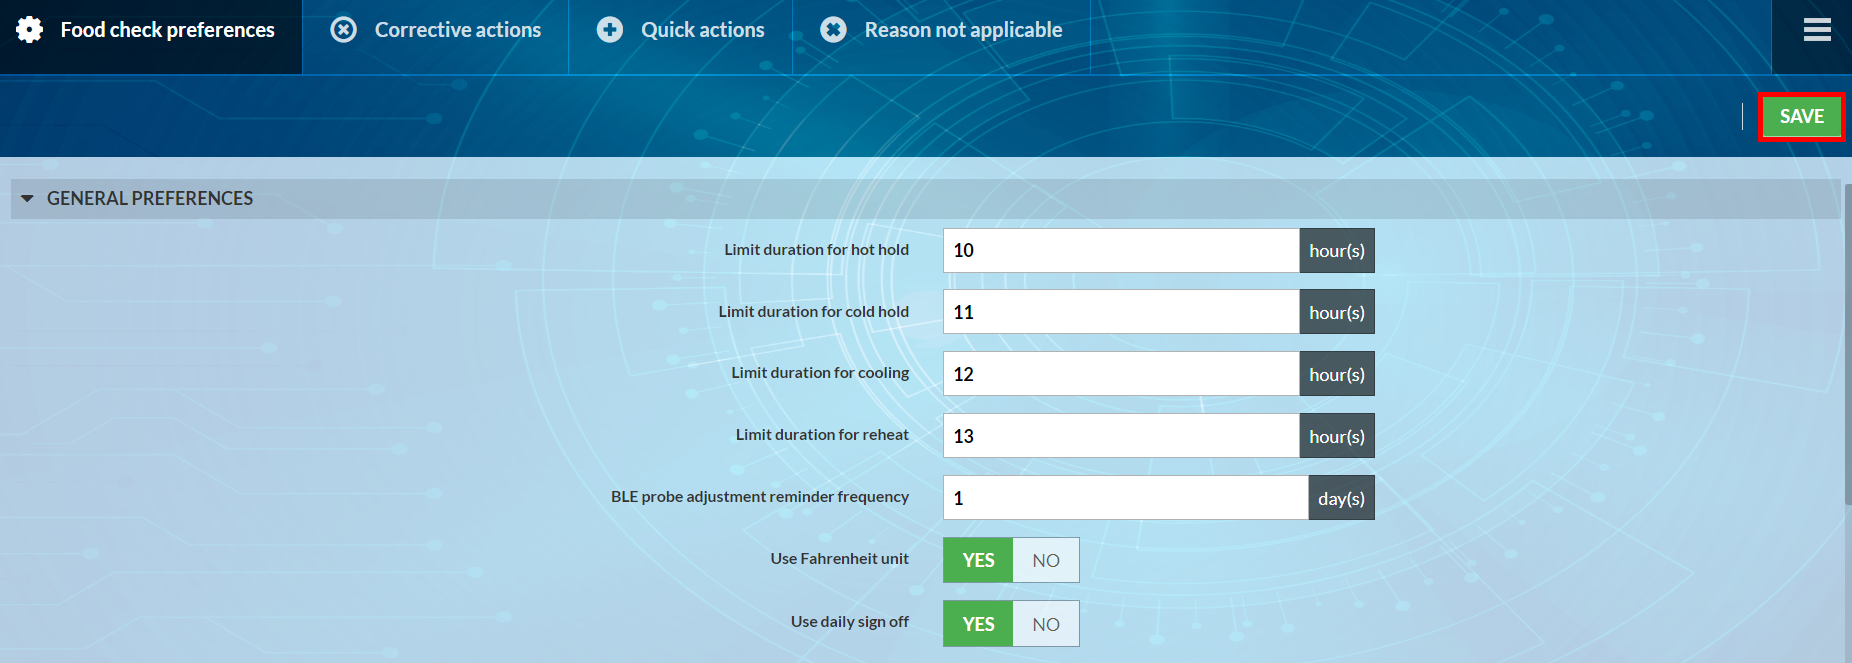
- Time limits for hot hold, cold hold, cooling and reheating.
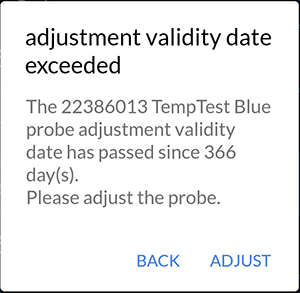
- BLE probe adjustment reminder frequency: Set the desired adjustment frequency for Bluetooth thermometers connected to MyFoodCheck. Once the deadline has arrived, when the thermometer connects to the application, an information message will appear.
- The choice or not to use the Fahrenheit unit in the application.
- Whether or not to use checklist validation, if YES is selected an admnistrator will have to validate the checklist results every day (see Validation).
Once changes have been made, click on SAVE to apply them.
Controls Customization
Allows the administrator to mount or dismount control types for specific users.
In the “Control type” column, if the box is unchecked, the control will not be available for checklists and quick controls.
In the “Allow manual checks” column, if the box is unchecked, the check will only be available in checklists and not for quick or manual checks.
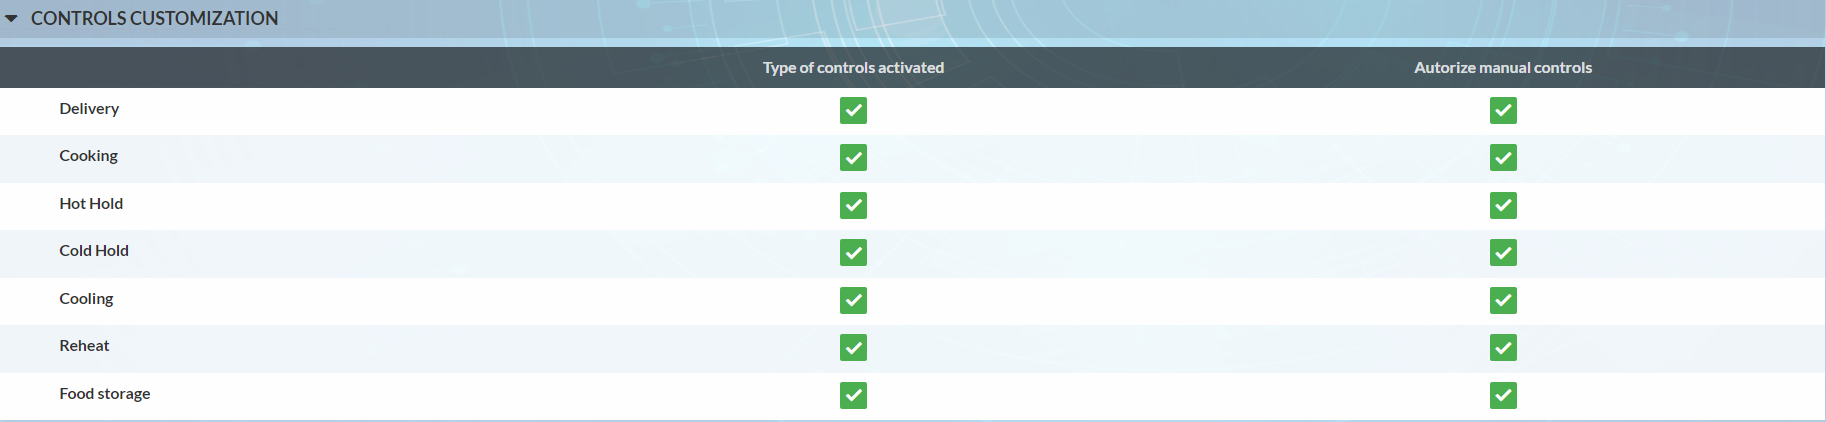
- Once you’ve made your changes, click on SAVE to apply them.
- Preferences set in MySirius are applied to all users of the MyFoodCheck app.
- Once the changes are made, click on SAVE to apply the changes.
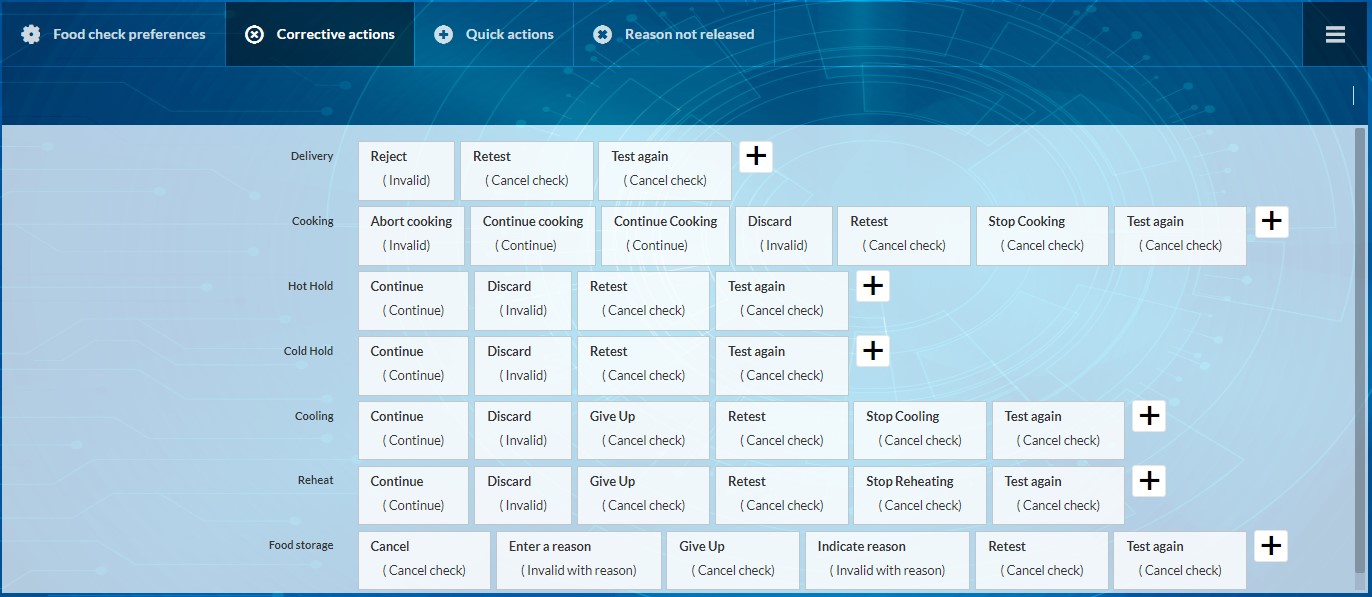
Corrective actions
It is possible to modify or add items to the list of proposed actions following a test carried out on the app.
- Add an item: Click on + and choose the type of action and the name
- Modify an item: Click on the name of the item
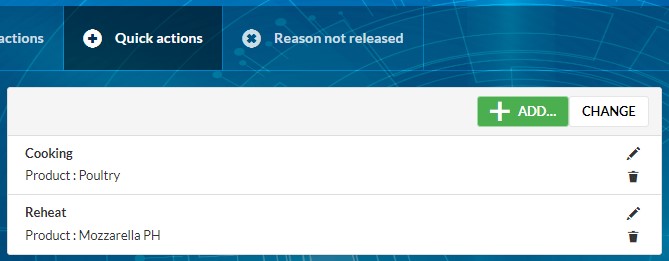
Quick actions (checks)
Create shortcuts on the app to perform pre-configured checks quickly.
- New items can be created with the ADD button.
- The CHANGE button allows you to change the display order in the mobile application.
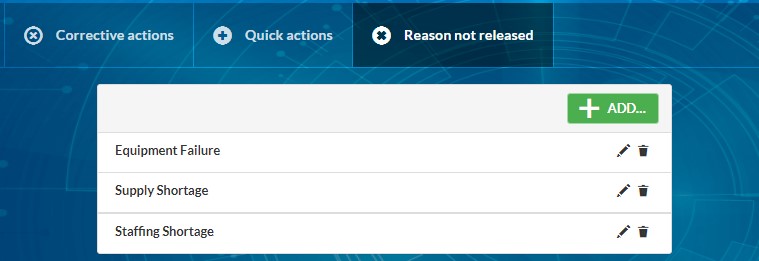
Not released reasons
For checks that are not applicable or not feasible (lack of personnel / defective equipment, etc.), it is possible to choose on the app the reasons for not realizing the test.
- To add an item, use the ADD button
- To modify an item, click on the pencil
- To delete an item, click on the “trash” button
Store
The “STORE” tile groups all the elements specific to each site.
Controlled products
- It is possible to declare product categories with cheking thresholds that will apply to all the products in the category.
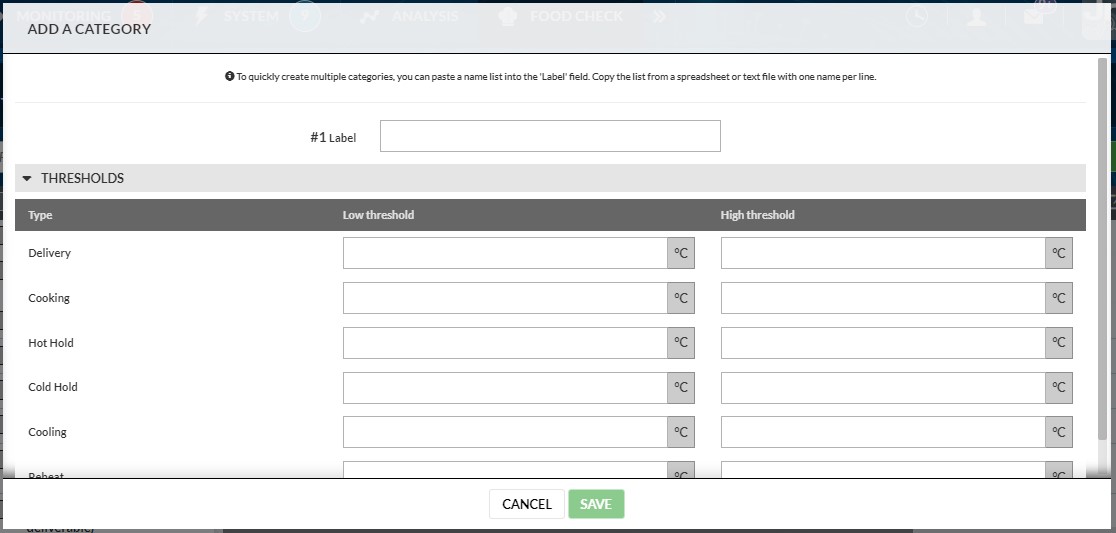
- It is also possible to declare a single product with its own checking thresholds and associate it with a category. A grouped add can be done by pasting the list of products in field #1.
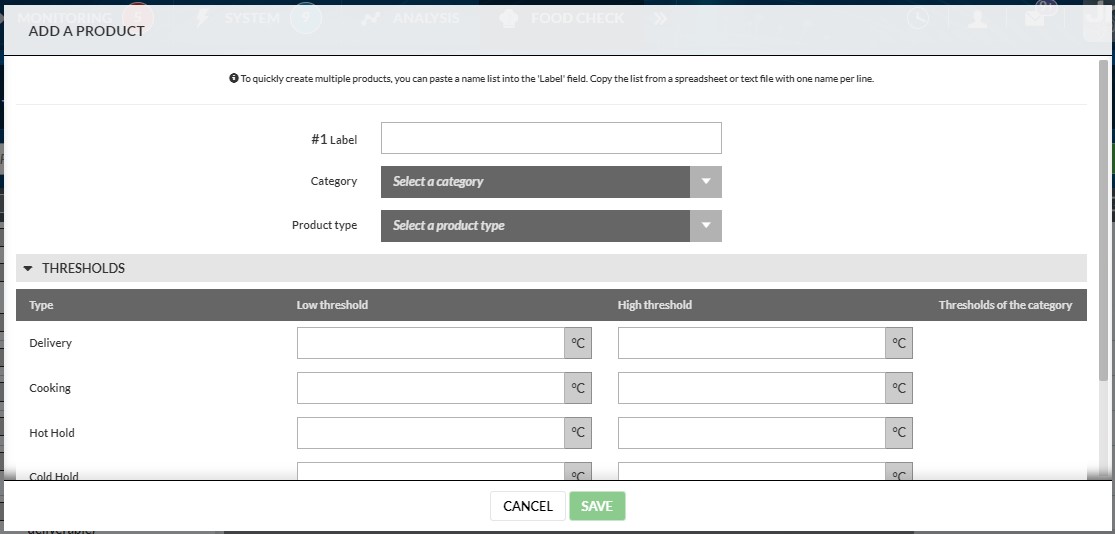
- The type of product (deliverable / edible) must be specified so the product will be proposed in tests. Ex: an edible product only, cannot be proposed in the app during a DELIVERY test
It is possible to enable or disable a product by using the “eye” button.
- Select an item from the list
- Click on the eye to enable/disable the product
- To enable a disabled product: go to the list of inactive products, then click on the “crossed out eye” button to reactivate it.
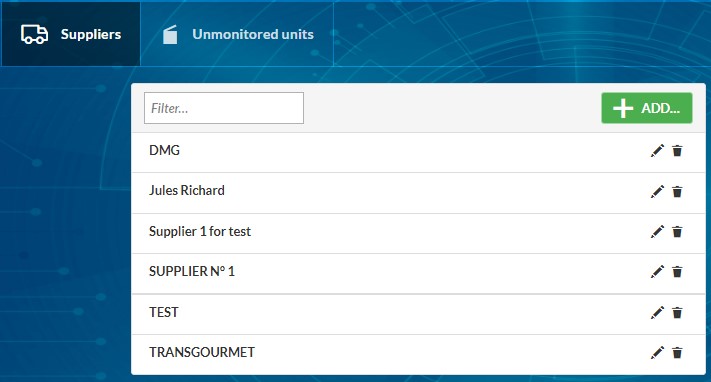
Suppliers
Cliclk on the ADD button to create a new supplier. It is possible to modify or delete a supplier by using the “Pencil” and “Trash” buttons A supplier used in a control cannot be deleted.
Unmonitored units (equipment)
It is possible to add unmonitored units/equipements and make them available on the mobile app to check the products stored inside.
- Click on the ADD button to create new items. The target temperatures must be entered to validate the tests.
- Equipments can be selected to be enabled/disabled by clicking on the “eye” button

Checklists
Checklists can be predefined in MySirius.
- A list can be assigned to a user, a group or everyone.
- A list can be run over a defined daily time slot and can be repeated on a weekly schedule
- A list can contain one or more items to be checked. Items to be checked can be products or categories.
Adding a checklist
To add a checklist :
- Click on the ADD button
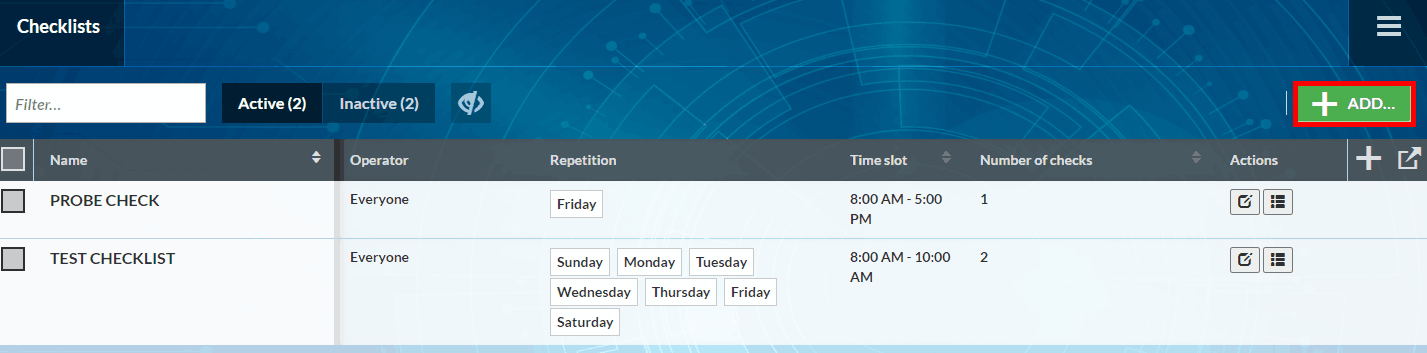
- Fill in the various fields and click on NEXT
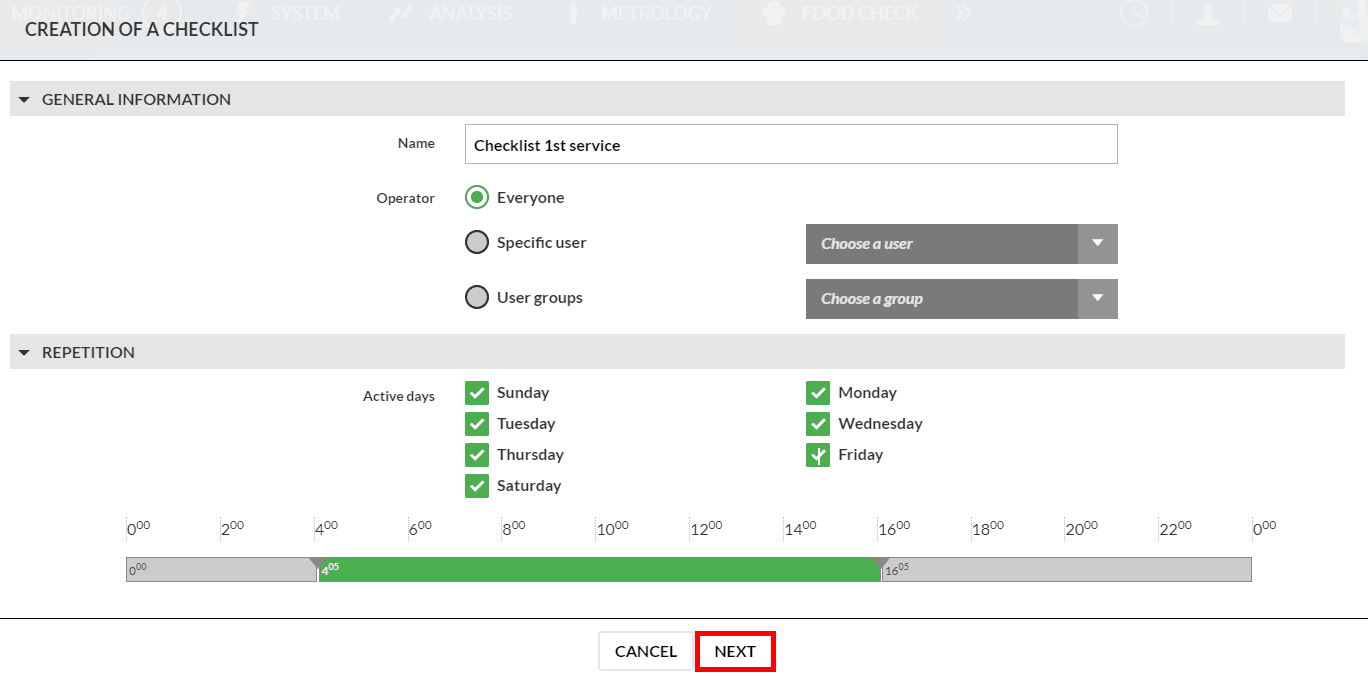
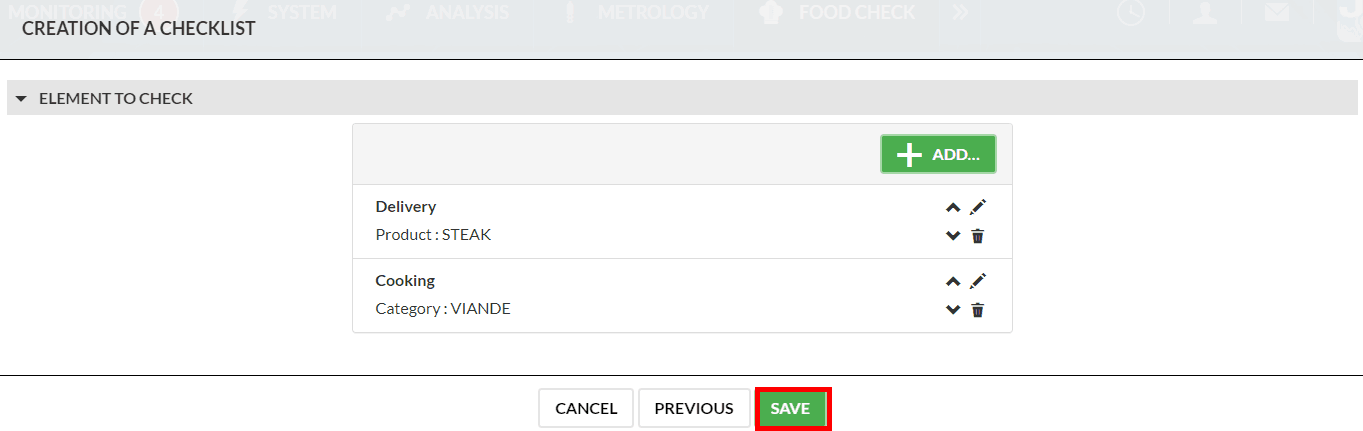
- Click on the ADD button, to add elements (products or category) to be check into your checklist
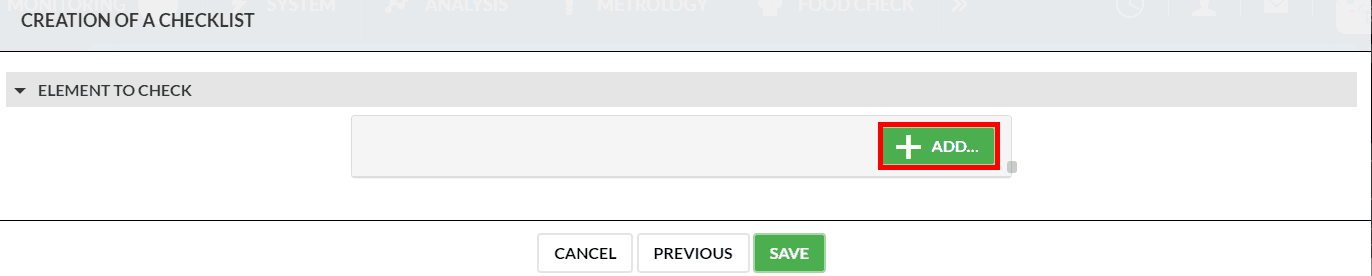
- Define the order of the check, then click on the SAVE button
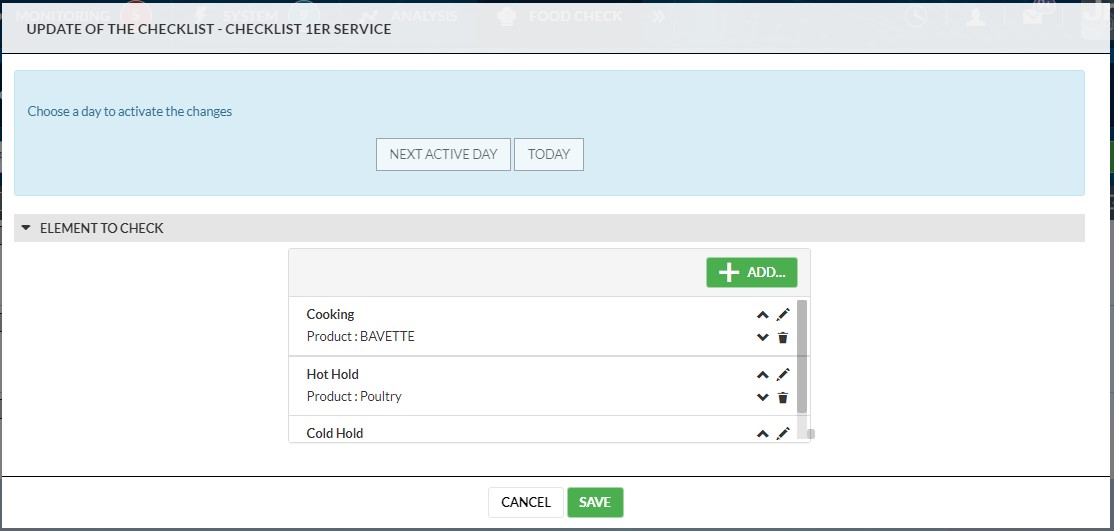
To Modify a checklist
To modify a checklist, use the 2 buttons 
- The first button: modifies the name, the target and the planning of the checklist
- The second button: changes the items to be checked and their order.
Results
Checks
The results of the checks are grouped on an exportable page with customisable column order.
- Use filters (date, type, status) to display the desired data in the table
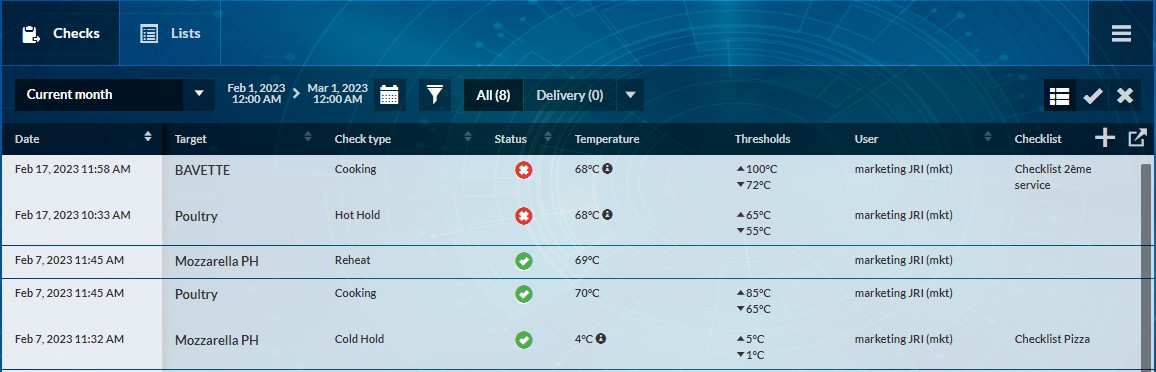
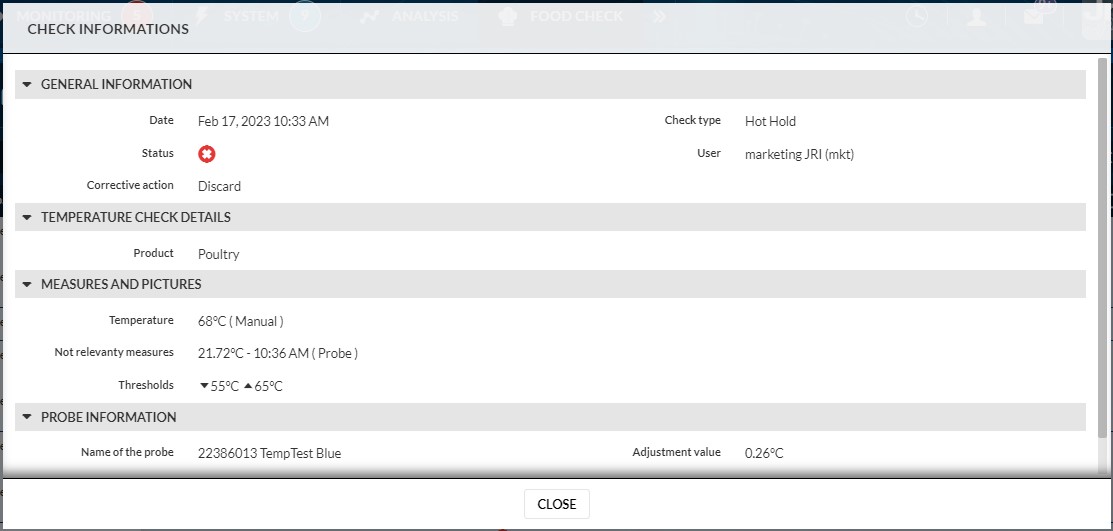
- Clicking on the name of a target (Product) displays the details of the control, including the type of measurements made:
- Probe measurement
- Manual measurement
Lists
The results of the lists are grouped on an exportable page with customisable columns.
- Use filters (date, type) to display the desired data in the table
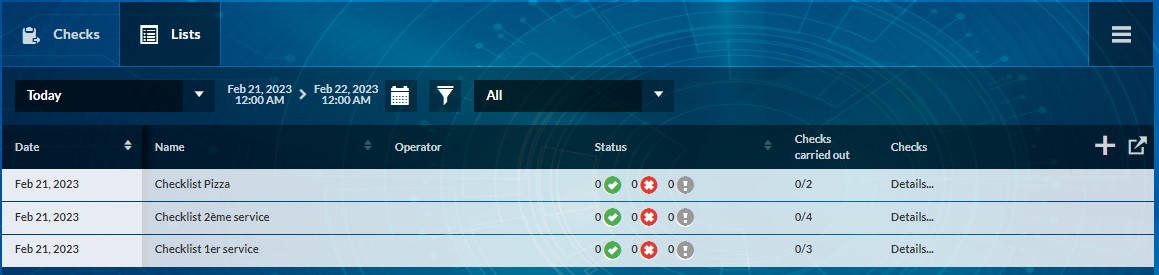
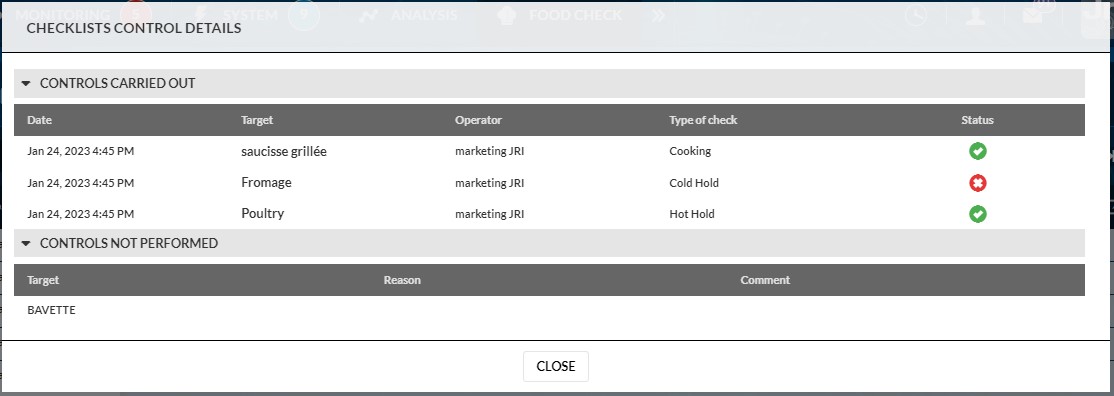
- Clicking on “Details” of the controls displays additional information
Using the MyFoodCheck mobile application
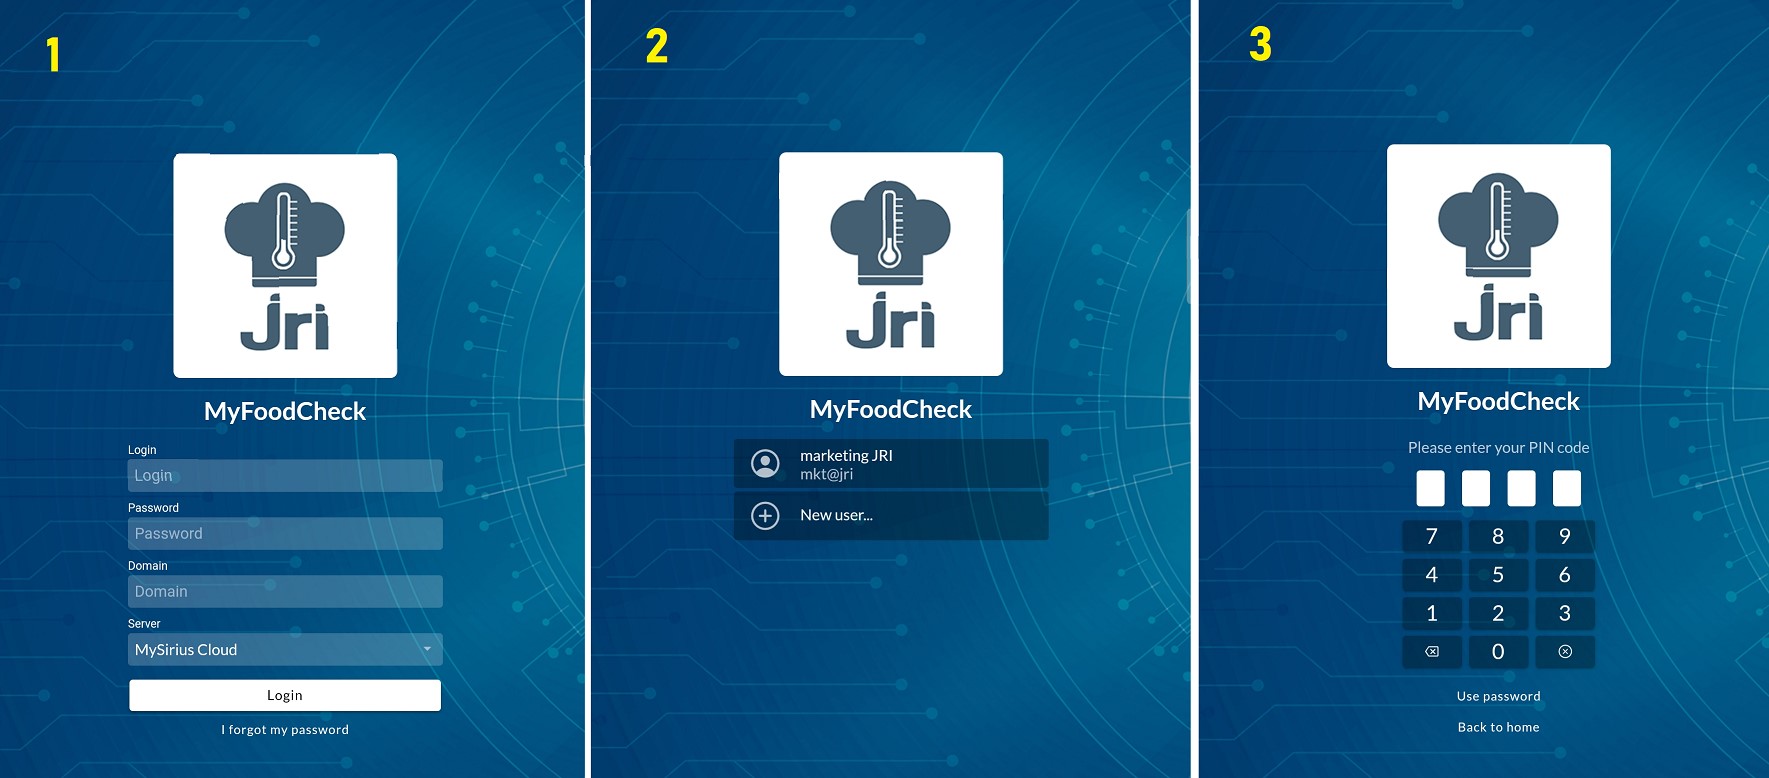
Launching and connecting
1- For the first use, fill in the requested fields. 2- For other connections, simply choose an account already in use then type the password to log in or select New user. The language set in MySirius for the user will be used if available in the App. 3- It is also possible to associate a PIN code to a user account.
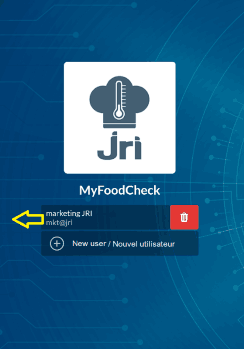
It is possible to remove a user from the login page just by swapping it to the left, then clic on the DELETE button.
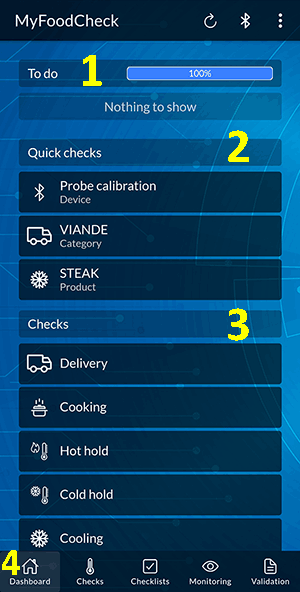
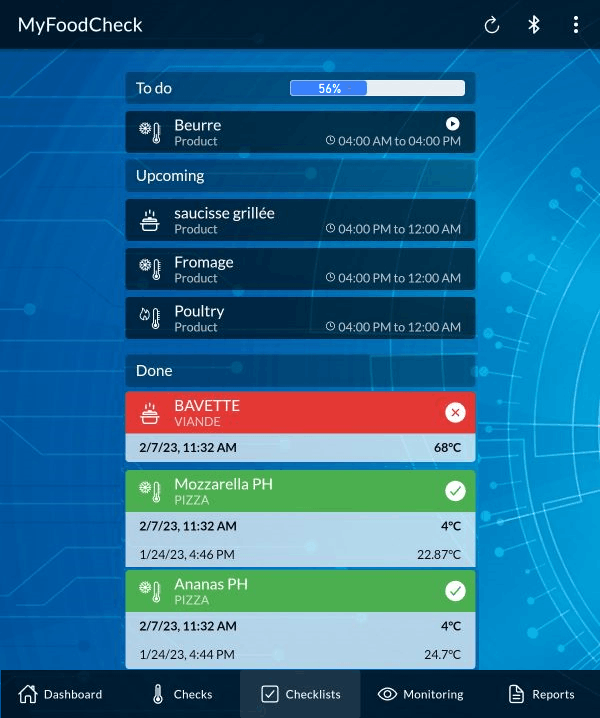
Home page
Once you have logged in, you will see the home page below. It includes 4 important sections:
1- The checklists to be carried out with the completion rate 2- Shortcuts to quick checks 3- Checks 4- Access bar to the 5 menus
- DASHBOARD
- CHECKS
- CHECKLISTS
- MONITORING
- VALIDATION
Pairing and adjusting a BlueTooth thermometer
- Connect a thermocouple probe to the BlueTherm One or Temp Test Blue thermometer (no action required for the RayTemp Blue as the infrared sensor is integrated)
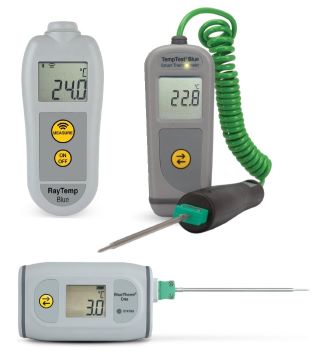
- Switch on the device by pressing the yellow button (ON/OFF or DOUBLE ARROW).
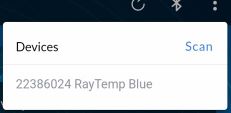
- Go to the MyFoodCheck application and click on the serial number of the detected device. Update the search by pressing “SCAN” if the automatic detection failed.
- When the thermometer is detected, its STATUS LED will flash and its serial number will be displayed.
- If the Bluetooth connection is not activated on the mobile device, MyFoodCheck will ask you to enable it.
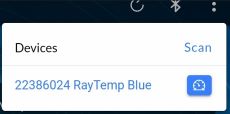
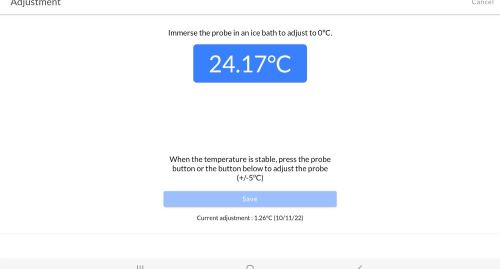
- Clicking on the adjustment button (BLUE BUTTON) allows you to adjust by immersion in a 0°C ice bath. Once the temperature has stabilised, press the yellow button for the measurement and click on SAVE.
## Taking measurements
- Select a check from the sections: CHECKLISTS; QUICK CHECKS or CHECKS.
- For the CHECKLISTS section: A new check is made by clicking on the

- When the temperature window is displayed, press the yellow button on the probe

- The value is then instantly transmitted to the application.
- Depending on the configuration of the thresholds, the value will be displayed in red or green.
- If the value is not compliant, a list of corrective actions will be proposed.
- If the value is copliant, it can be validated by clicking on “VALIDATE MEASUREMENT”.
- 2 measurement modes are possible: “Manual” or “Probe”.
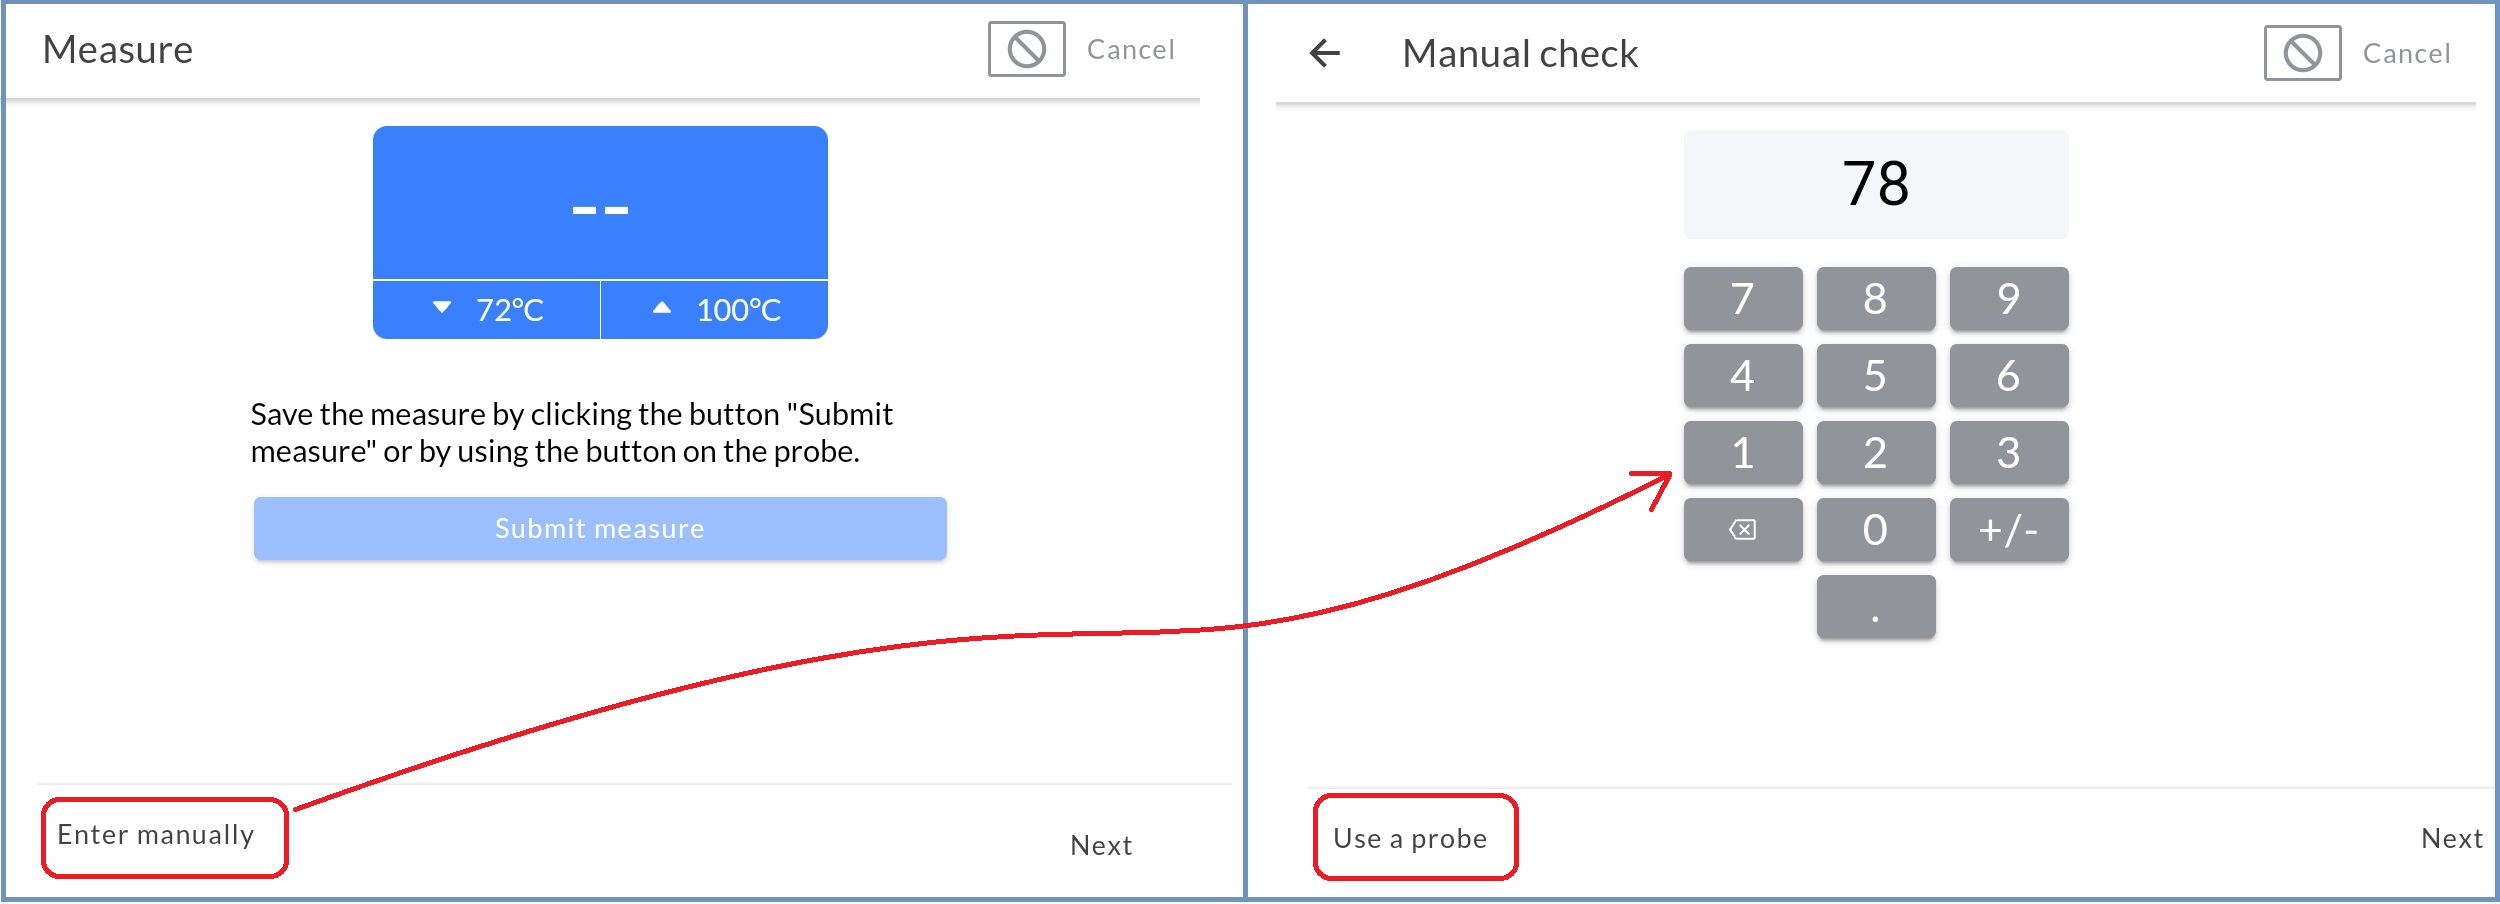
MyFoodCheck controls
Checklist
- The completion rate indicator is 0% when no checklists have been completed. It is at 100% when all checklists have been completed.
- Select a checklist:
- Take an action and then VALIDATE or choose a CORRECTIVE ACTION from the list.
- Validated checklists disappear from the TO DO list and are displayed in DONE, an update of the completion rate is made. Checklists that need to be rechecked remain visible.

Checks
All checks are made according to the same principle:
1- Choice of check 2- Choice of products/categories/prints to test 3- Taking measurements 4- Validation or choice of action from the list 5- Automatic sending of the result to MySirius
Example: Delivery
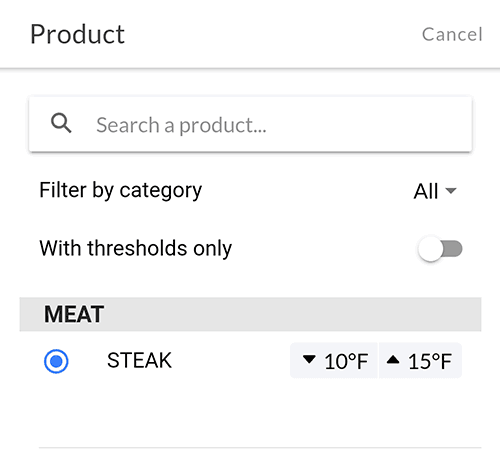
- Select the product to be checked. You can filter by category or you can use a filter to show only controls with temperature thresholds.
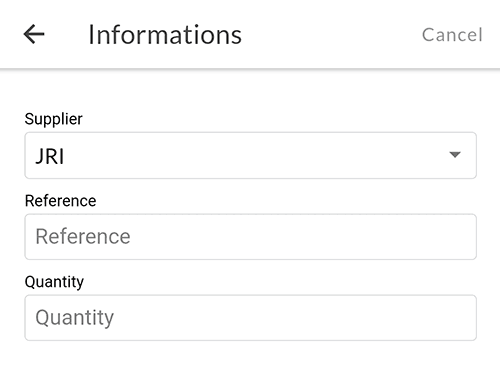
- Enter information on goods received (supplier, item no., quantity). Item number and quantity are optional fields.
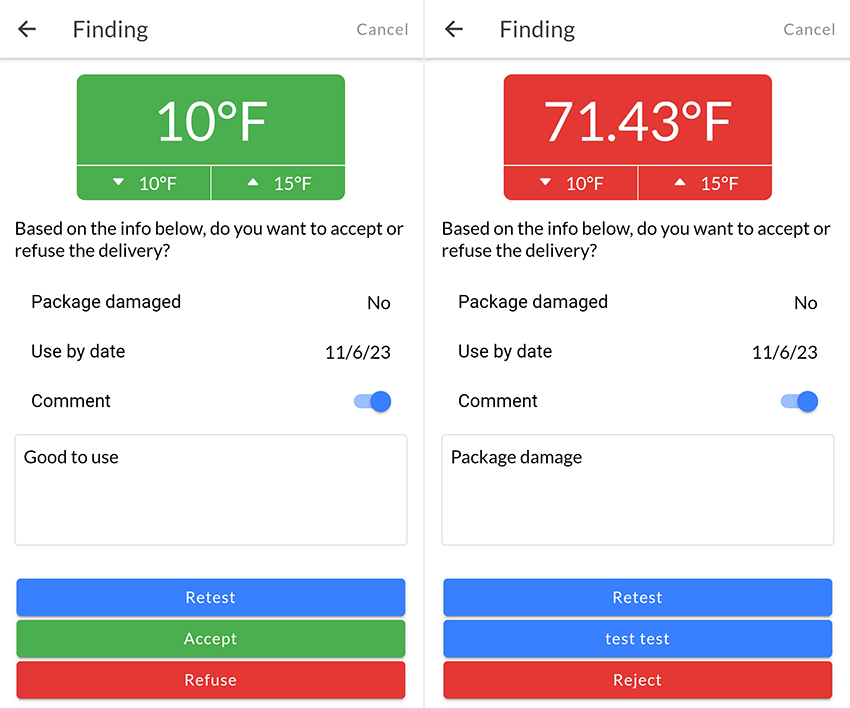
- Define if the package has been damaged or not, with the option of taking photos and filling in the Best Before Date or Minimum Shelf Life.

- Take the T° and enter a comment if necessary
- The user then has three options:
- Refuse
- Re-test (only if tests are not conclusive)
- Carry out a corrective action
- Validate the control.
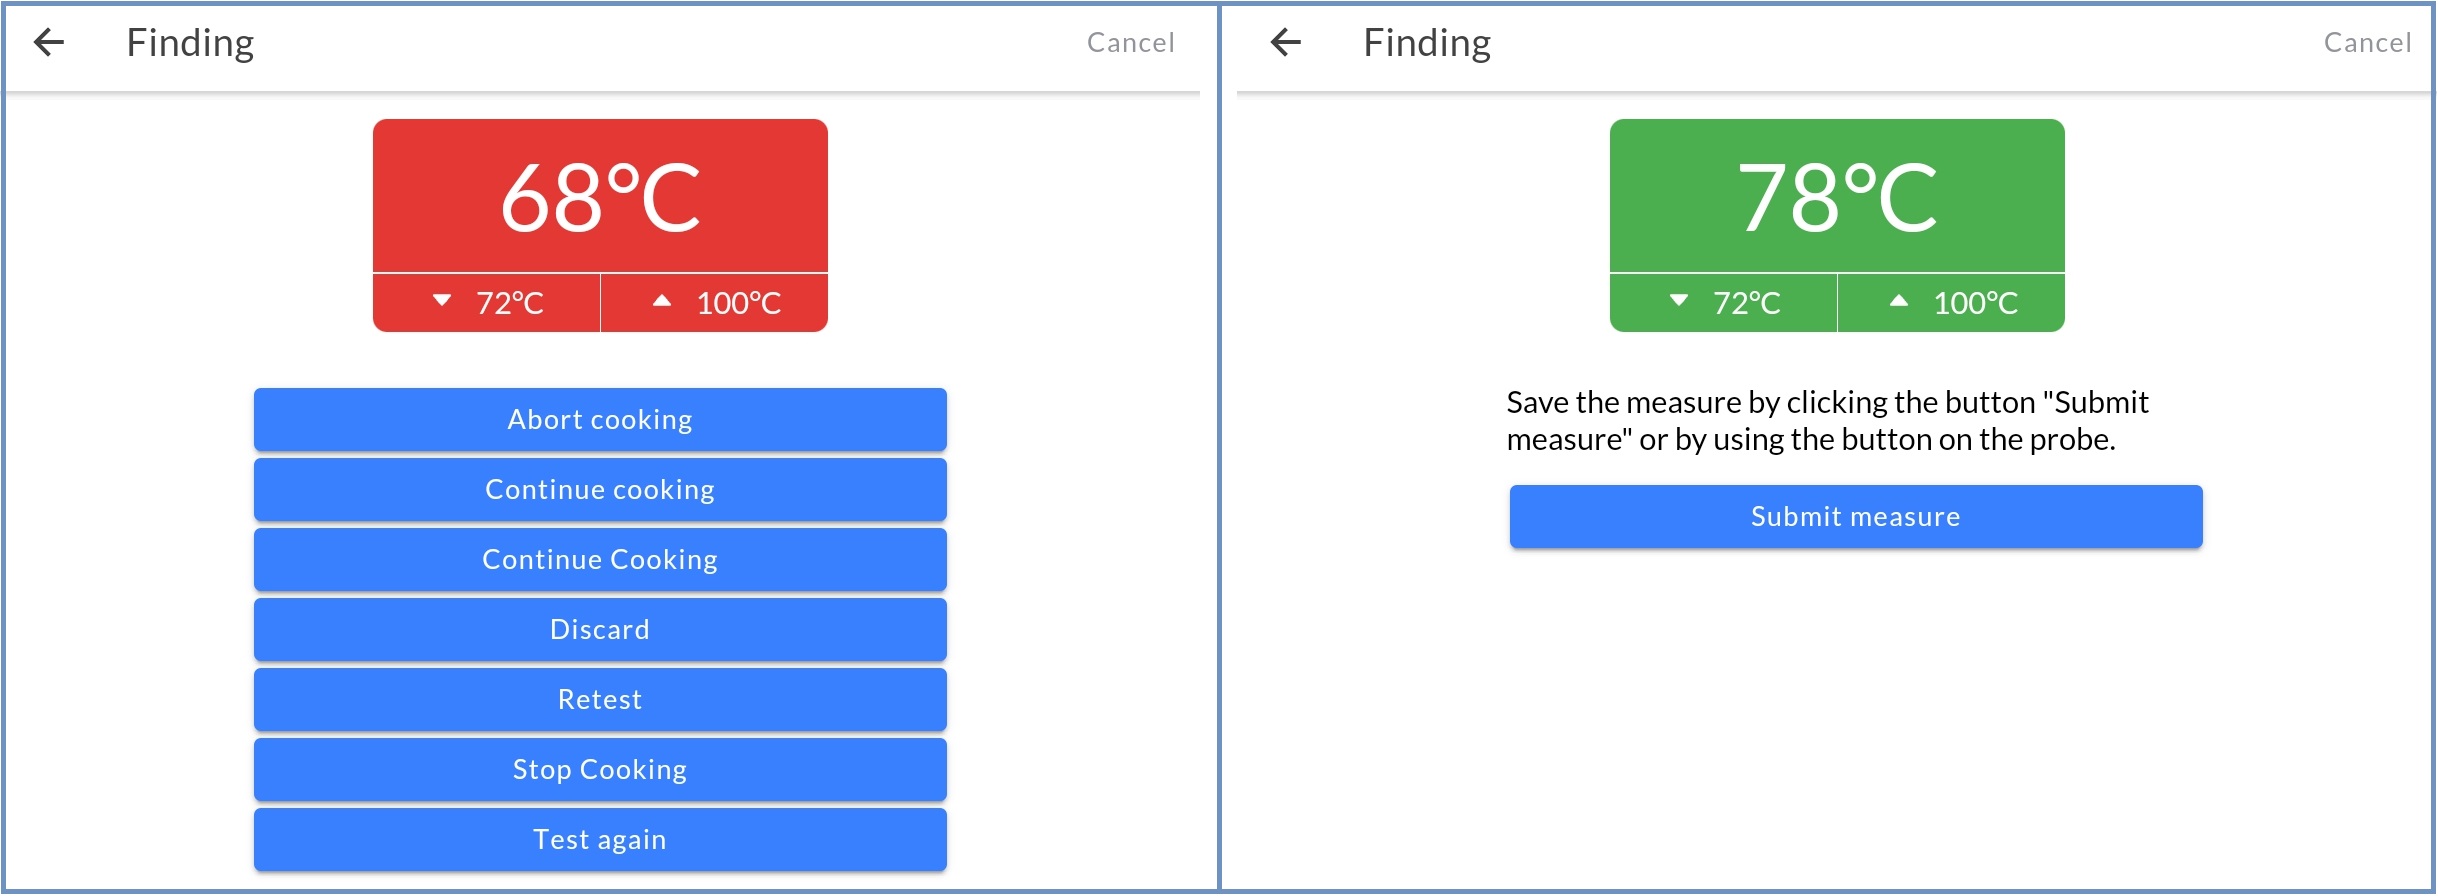
Cooking
- Select the type of product and take the T°.
- If the cooking T° is not reached, a list of actions is proposed.
Examples :
- Continue cooking.
- Stop cooking and discard the product.
- Repeat the T° measurement.
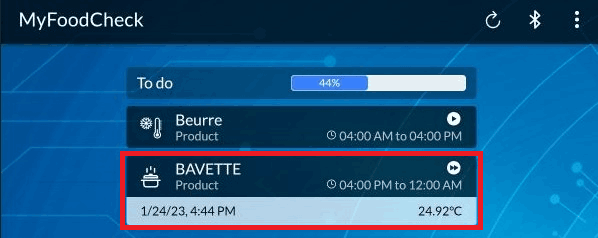
In the last case, a blue indicator appears on the “Cooking” tile and the information is reported in the list of current controls.
Maintain Hot/Cold and Cool/Reheat
The same as the previous case:
- Product selection
- Measurement
- Choice of actions
Food Storage
- Selection of an unmonitored unit in MySirius for T° control of the stored products.
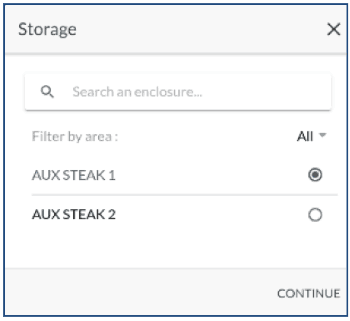
- Taking a measurement
- Choice Actions: If the T° is not in conformity, it is possible to enter a reason (e.g.: door opening)
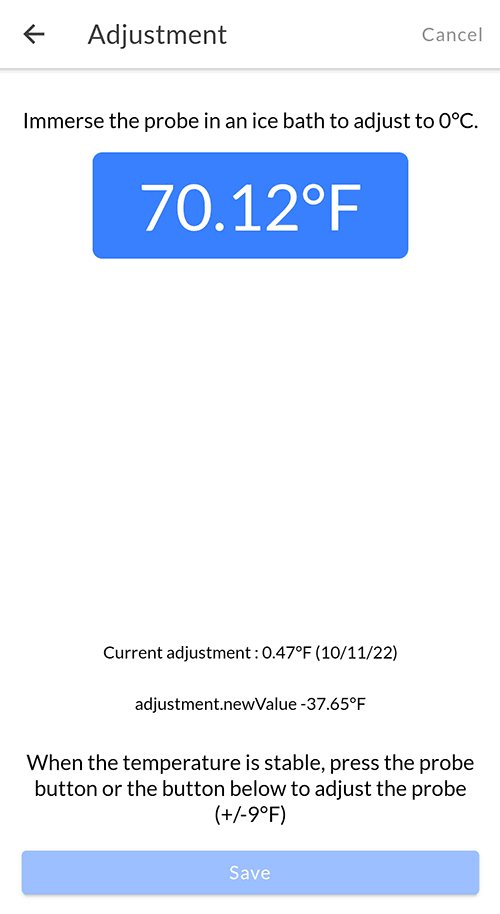
BLE Probe adjustment
- Select the device to be adjusted
- Immerse the device to be calibrated in an ice bath at 0°C.
- Once the temperature is stabilized, press the yellow button to take the measurement and click on SAVE.
Monitoring
- Display of the monitored units in MySirius, including those in alarm (red indicator)
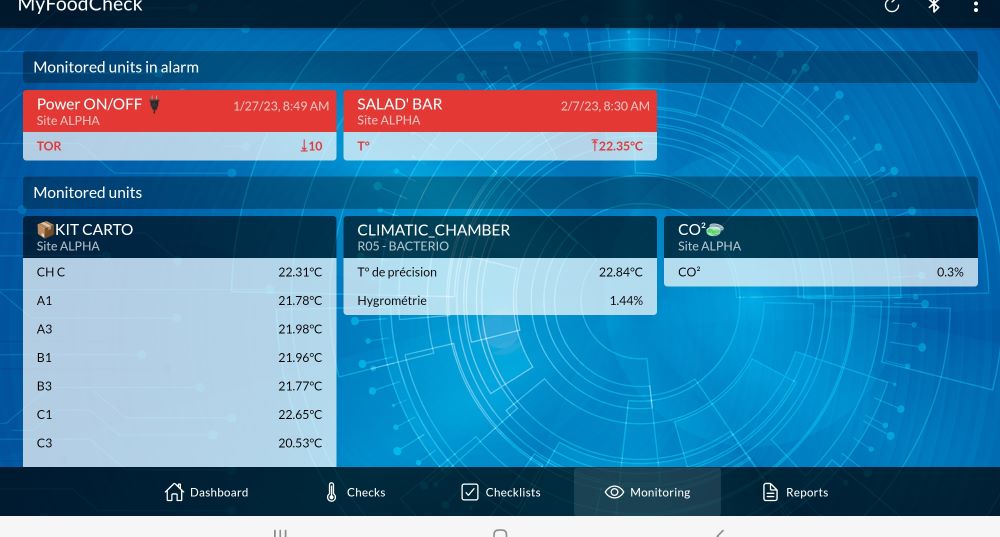
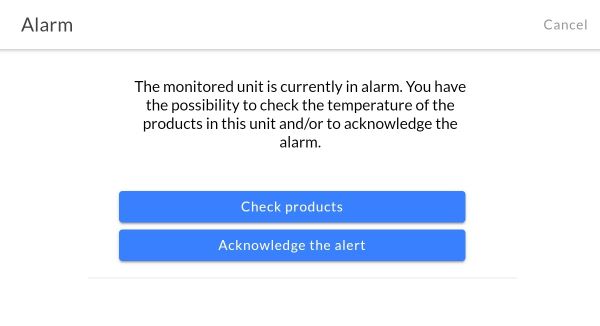
- Selection of monitored unit in alarm mode to carry out an alarm acknowledgement or a check on one or more products stored in the unit:
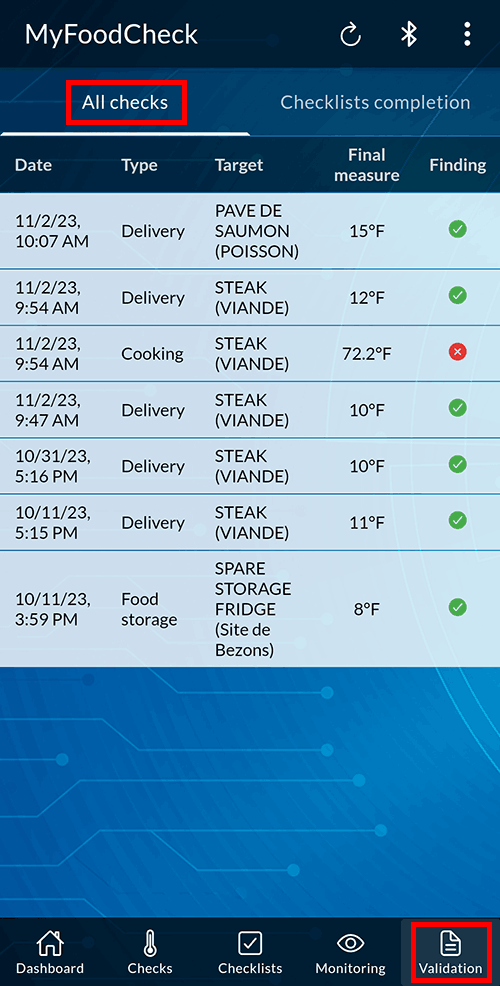
Validation
The test reports are visible on the application.
- Reports and results of all tests:
- Checklist completion and validation:
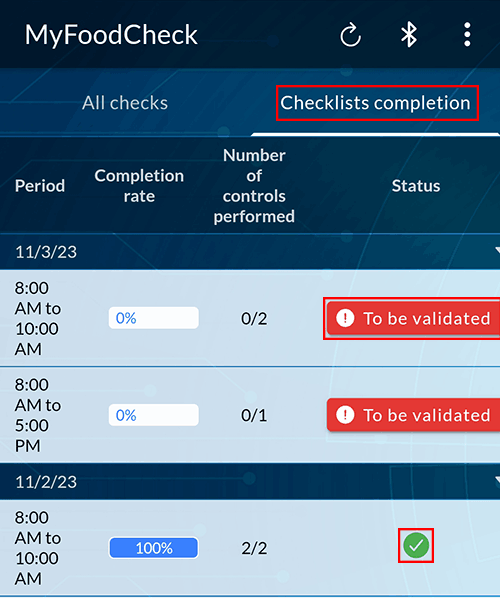
If the Validate checklists option is enabled, a user with the Administrator profile will see a “To be validated” button in the “Status” column.
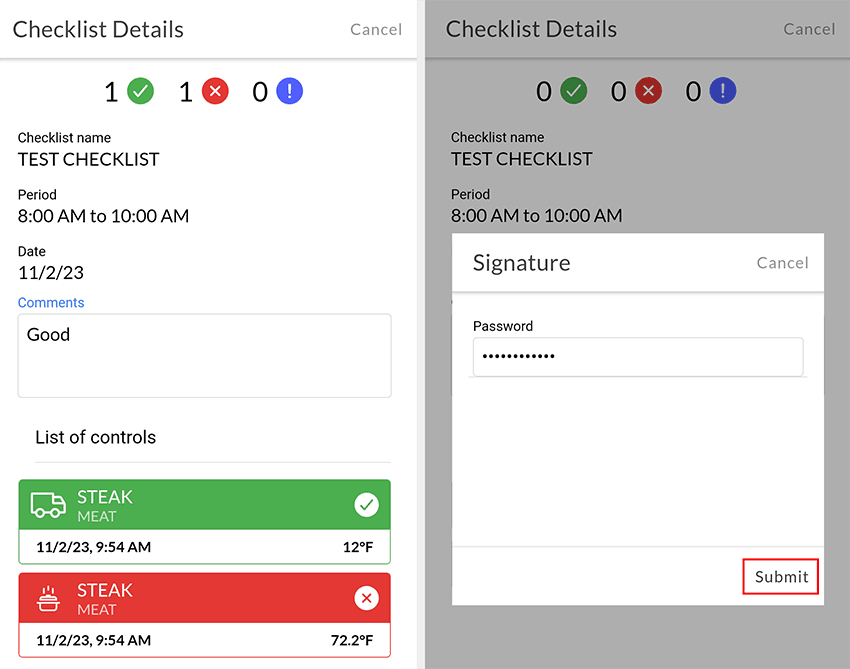
The administrator can then comment on the results and sign using his MySirius login and password. Once the checklist has been signed off, the ![]() icon will appear in the “Status” column.
icon will appear in the “Status” column.
These reports are more detailed in MySirius (see beginning of document: Results / checks). It is possible to generate automatic reports with the MyfoodCheck data via the TOOLS / REPORTS tab.